Building a Telescope Pier: Version 4.0
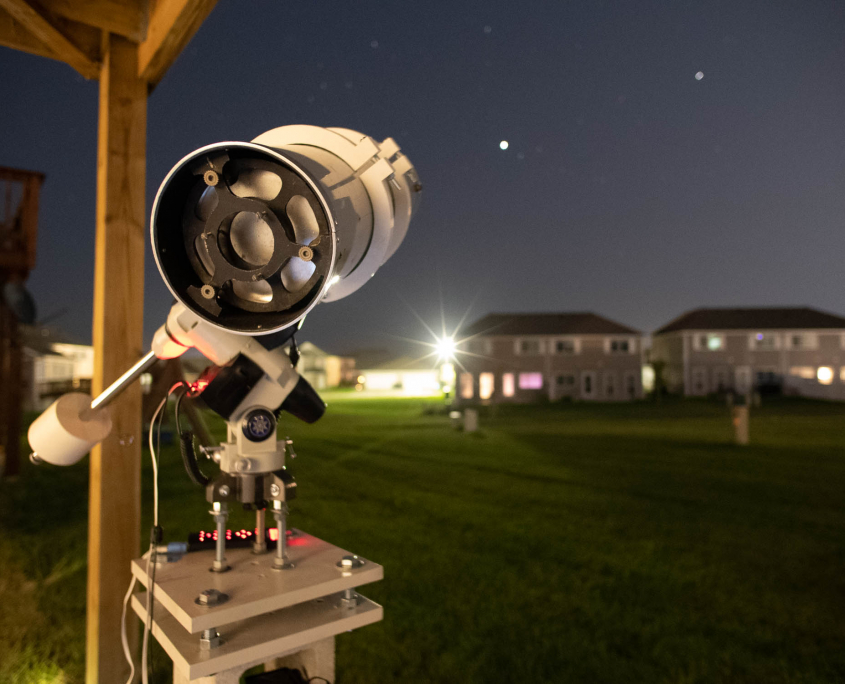
This is the latest installment in my quest for a simple, inexpensive but solid telescope mount. The quest began in 1994 when I bought my Meade 8” LX200. In early 1994 I decided to build a deck out over the old patio, so I first poured a 12 inch tall concrete pier that was slightly below the level of the new deck.
I had Rivers Metal Products make a pier using three 1” pipes. It had a top plate with a nut welded in place that matched the threads on the base of the LX200.
This arrangement worked well for many years, until I bought the equatorial wedge. Having the scope on the deck was very convenient, but I couldn’t see Polaris from there which made polar alignment difficult.
In 2003 I decided to pour a pier on the southeast corner of my lot just next to the deck. Polaris was visible from that location. I also extended the deck out around the pier to the edge of the lot.
This configuration worked well except for the street lights visible to the north.
A few years later I sold the LX200 (actually the second one) and switched to an LXD75 German Equatorial mount. The advantage was that it weighed a lot less and I wanted to be able to use different OTAs on the same mount.
I also bought a Celestron Onyx short tube refractor and later an Astro-Tech RC6. Both use the same size dovetail as the LXD75 mount.
I also wanted to be able to leave the mount outside for long periods, to avoid having to redo the polar alignment each time, and to make it easier to just grab a scope and start observing with minimal setup time.
While Googling for scope enclosures I discovered Motel o’Scope and decided to build my own version. I first built a wooden base plate that matched the J-bolt mount on the concrete pier, and built a cover following the directions on the Motel o’Scope site. I bought a used tripod head compatible with the LXD75 on Cloudy Nights and cut some legs out of wood, which can be seen in the next photo. This configuration was nice in that it also gave me a place to put accessories while observing.
In 2013 I decided to expand the patio from the deck to the full width of the lot on the south and west side. I’d already put in a fence, and then I realized that the southwest corner was a much better place for a telescope. It was less windy, more protected due to the fence, and the neighbor’s house blocked the street light.
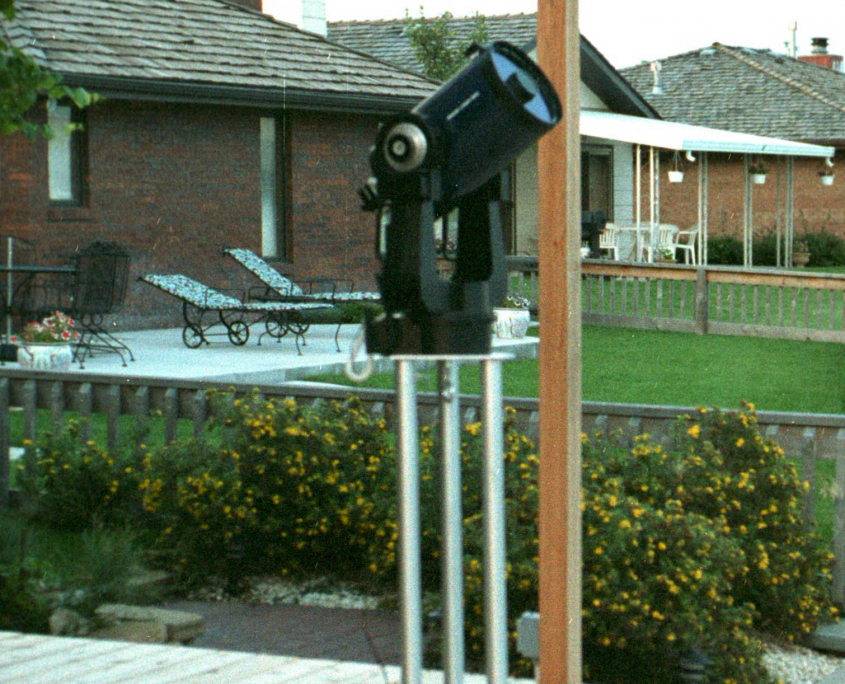
The 1994 Mount (V1)
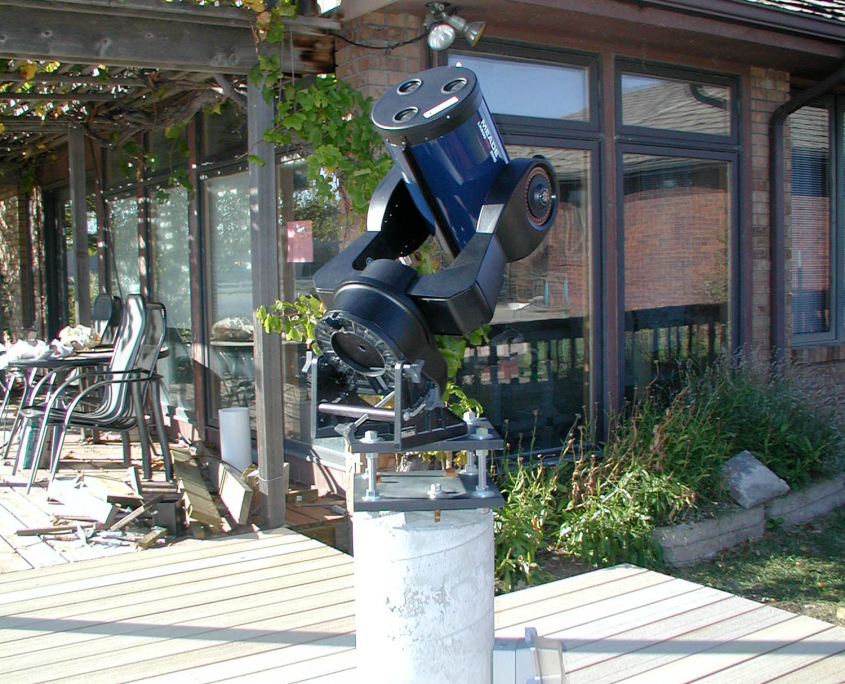
The 2003 Mount (V2)
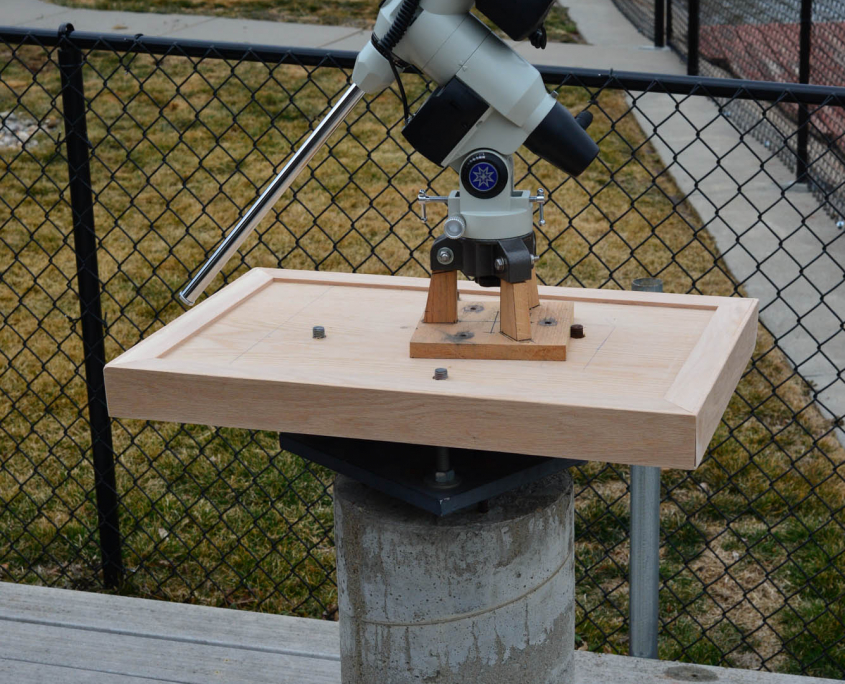
The 2013 mount with LXD75 GEM
Before pouring the patio I added another pier in that corner. The cover worked well and I often left the LXD75 outside for months at a time. As a precaution I put a desiccant in with the mount, but never had a problem with humidity or rust.
However, after a few years the UV exposure had taken its toll on the cover and it needed repairs.
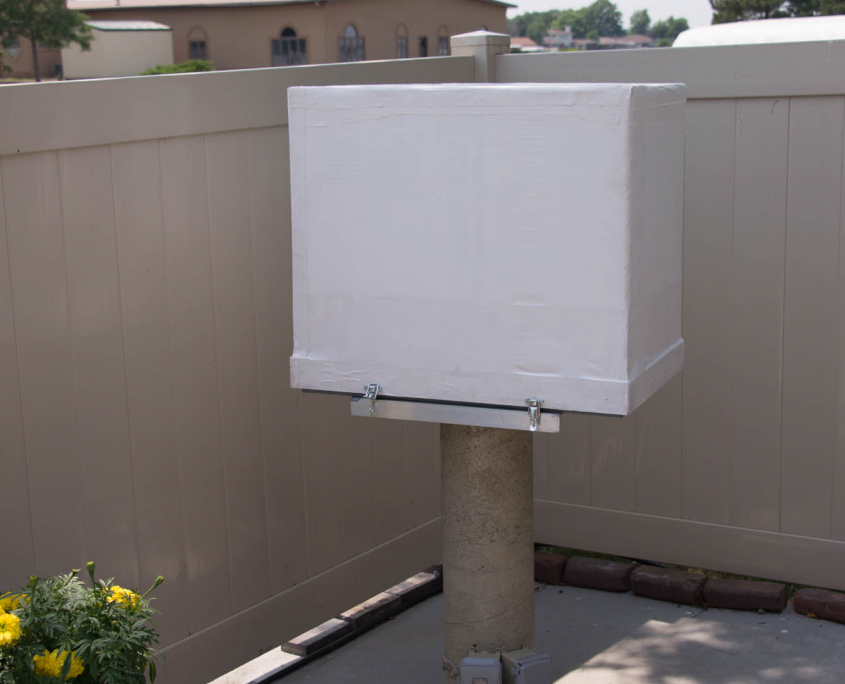
The new pier (V3) with the Motel-O-Scope style cover
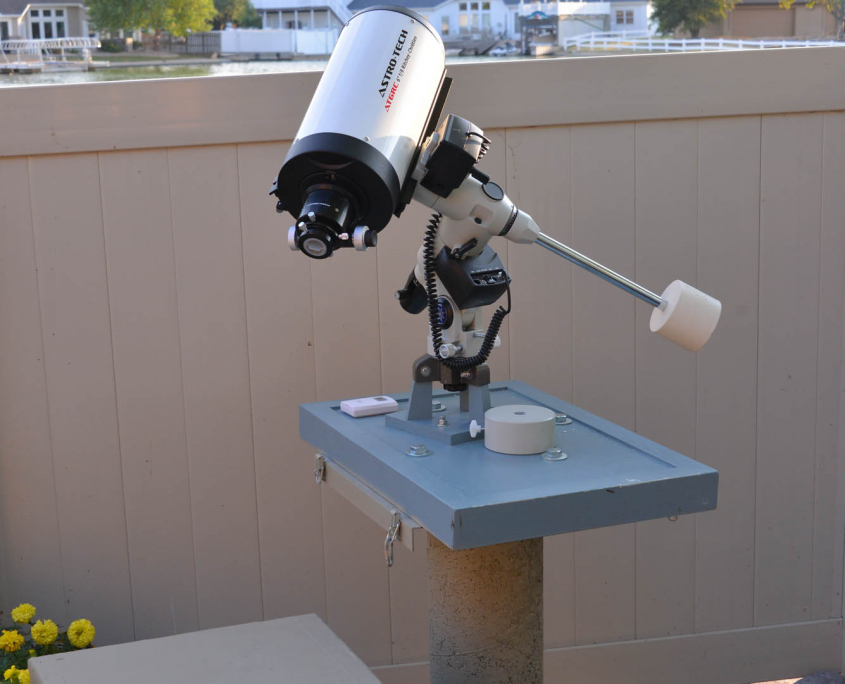
The 2013 mount with the RC6 scope
Onward to Version 4.0
In 2019 I decided to sell my house and downsize.
Before putting the house on the market, I “decommissioned” both piers – the second pier became a plant stand and the other one became a deck table.
I disassembled the Motel o’Scope cover which was already showing signs of deterioration and also recycled the wooden base plate. I kept the two aluminum 12x12x1/2 inch plates from the original pier and also the LXD75 tripod head.
My new place is a townhouse with walk-out basement and a small patio. For the past two years I’ve been using the scope tripod, but kept thinking about putting in another pier.
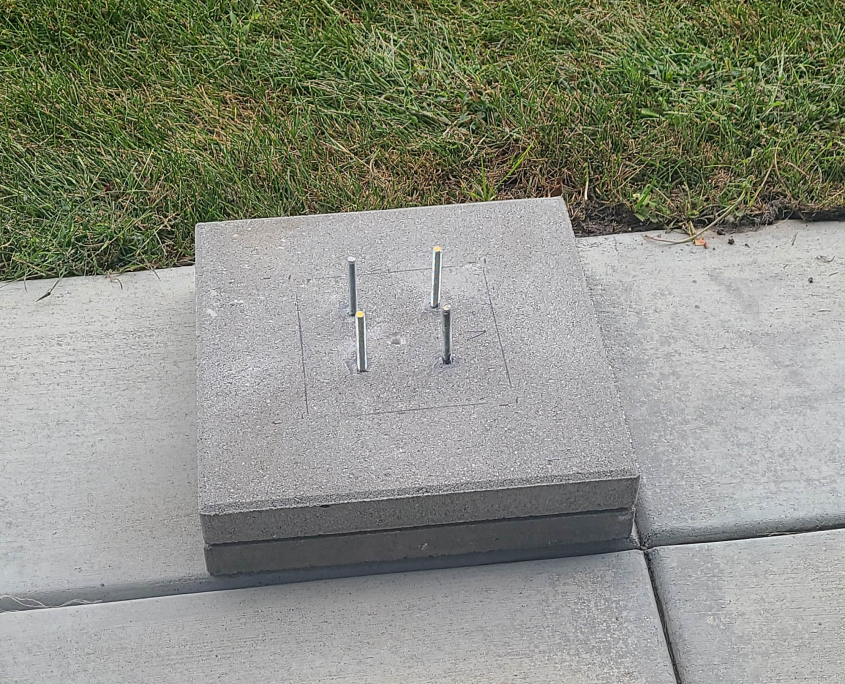
The base is made of two 16×16 stepping stones glued together with construction adhesive.
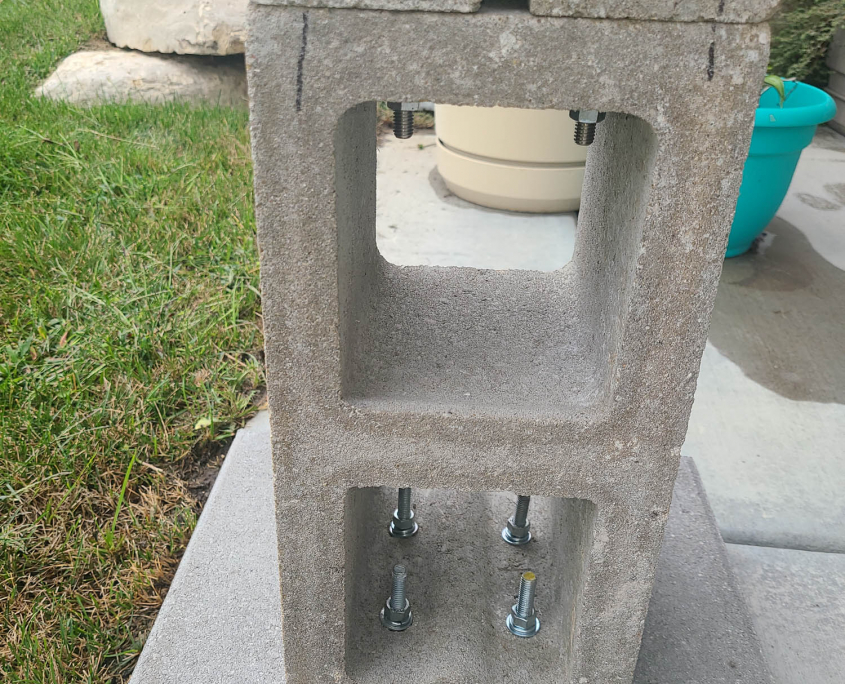
Two cinder blocks were stacked and bolted together.
After giving it some thought I decided to come up with a new design. My first criteria for V4: don’t install anything permanent that requires pouring concrete. I’m not sure how long I’ll live here and don’t want the hassle of having to remove a chunk of concrete when I leave.
While Googling for ideas, I came across an interesting concept using cinder blocks. I found several variations on this idea but here’s a discussion thread on Cloudy Nights that shows how its done.
But instead of pouring concrete I wanted one that could sit on the patio. It also had to have some mass, so once aligned it would stay put.
I bought a couple of 16” x 16” concrete stepping stones that weigh about 35 lbs each. I used a generous amount of Gorilla Heavy Duty construction adhesive to glue them together and then drilled four 3/8” holes for anchors. The holes were then cleared of all the dust using compressed air.
I rolled four 6” pieces of 3/8” threaded rod in JB Weld epoxy and made sure there was good contact with the concrete. After two days I tested the strength of the bond. One rod easily handled the weight of both stepping stones. I used some more construction adhesive to anchor the cinder block. I used four 3/8” x 4 bolts to stack the second cinder block and then mounted the 12×12 aluminum plate on top.
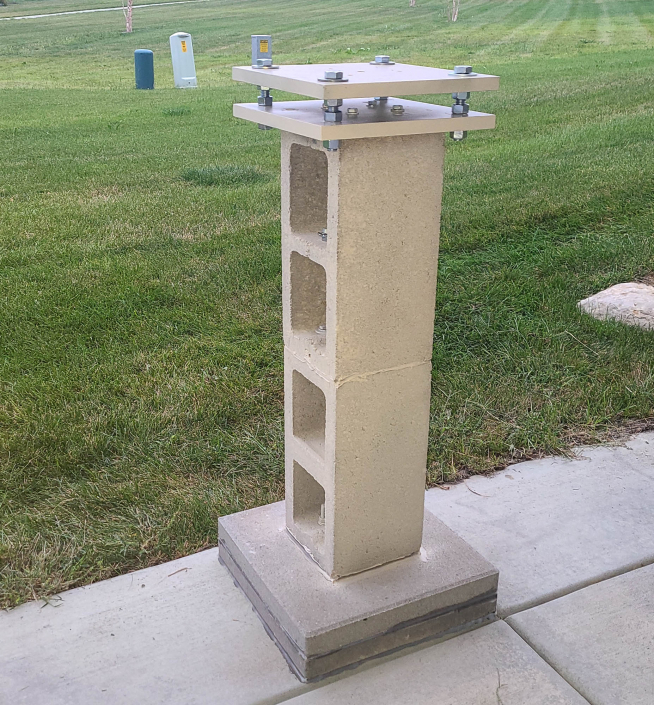
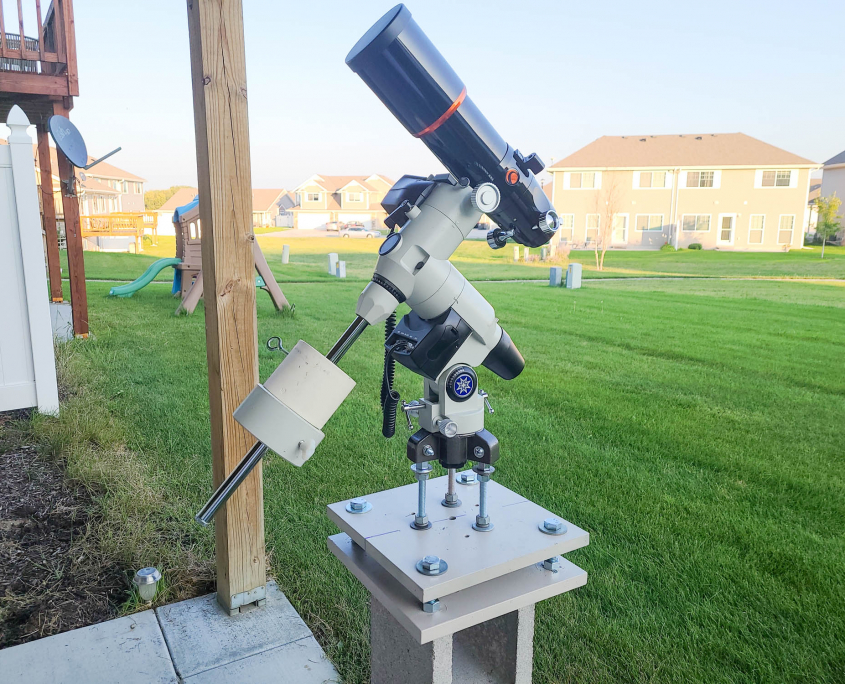
The aluminum plates from the V2 mount were reused to make a solid base for the tripod head.
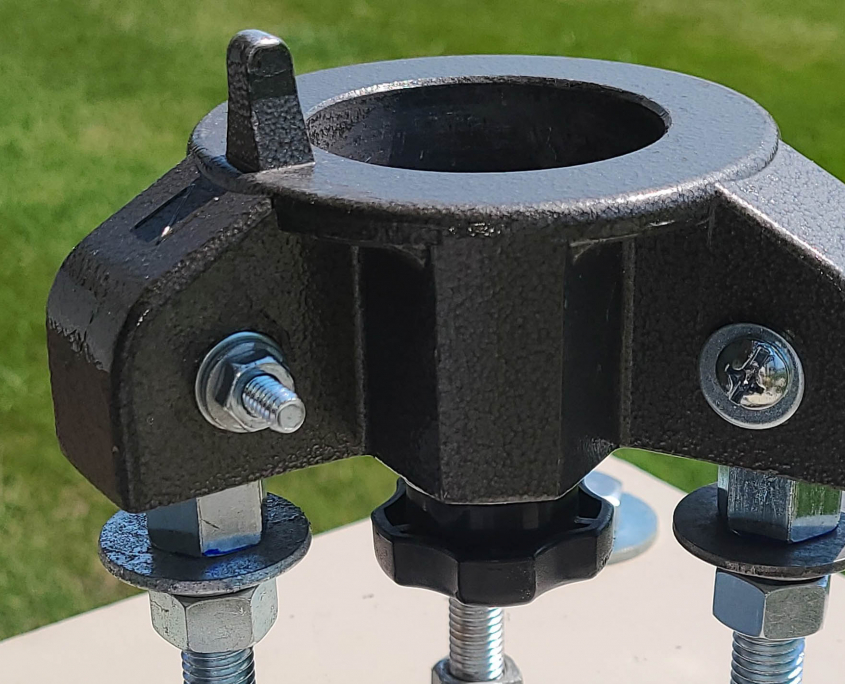
An old tripod head for an LXD75 modified to bolt onto the aluminum plate.
Instead of wooden “legs” for the tripod head, I bought three 3/8” threaded rod couplers and drilled holes at right angles to fit into the slots where the tripod legs would normally go. Three 3/8” – 5” bolts serve as the new tripod legs.
The next problem was alignment. The patio is on the south side of the house so once again the scope can’t see Polaris. I used Google Earth to determine the offset angle to true North, which is about 2.5 degrees. From about 50 feet south of the house I can see Polaris above the roof, so I lined up the mount visually and marked the angle on the base plate. To my surprise, when I powered up the mount and did a rough alignment, then slewed to Jupiter, it was within the field of view.
I next did an alignment using the drift method, which was easier than expected. I next made a laser target to facilitate quick realignment when bringing the LXD75 out from the basement.
Why not just use the Autostar easy alignment process? I like the LXD75 but have never had very good luck getting repeatable results with the two star alignment.
The target is a piece of wood mounted on the under-side of the deck. As long as the mount doesn’t move, this method of alignment will be more than adequate for my needs, since I’m not planning to do any long guided exposures.
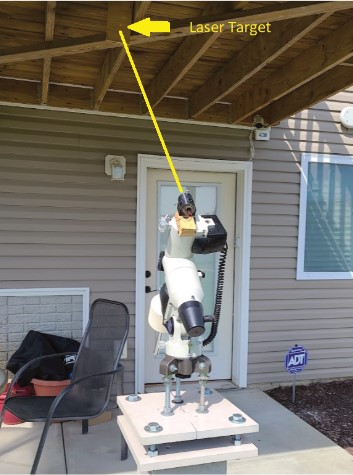
A laser clamped in the dovetail mount points to a target mounted on the deck. Assuming that the pier doesn’t move, accurate realignment of the equatorial mount is easy.
The new mount is surprisingly solid. The hardware cost was about $50. If I decide to move again in a few years, I could easily take it with me. I camouflaged it with a grill cover, so unless my neighbors see it with a scope attached, they probably won’t even notice it!
